Live Optical Alignment and Automated Lens Testing
I built a test rig and Python interface to speed up optical alignment and lens testing for a new microscope.
Quick Overview
The essential details you need to understand this project at a glance.
~ 30 sec read
WHY
- •The optics team was on a tight schedule to develop a new microscope. For each combination of fiber, lens, and wavelength, engineers had to adjust the alignment, read the laser profiler, calculate the beam metrics, and repeat. The process took time away from other development work.
WHAT
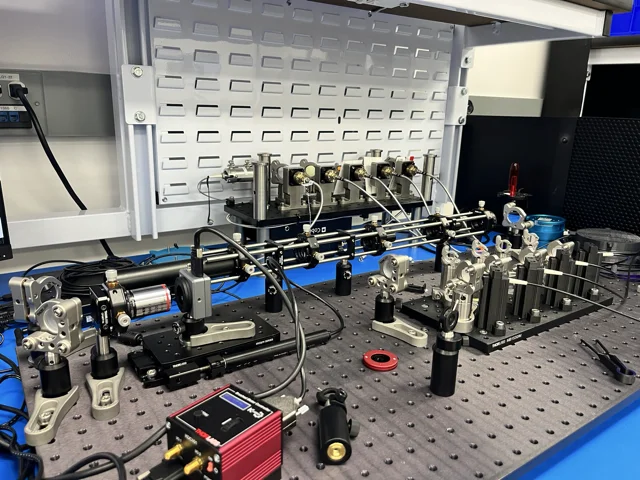
- •I built a test rig with a four-wavelength laser, a micrometer stage, and a laser profiler. A Python interface showed alignment and test data in real time, and automated analysis helped the team align the laser faster and more precisely. I documented the setup and code so the team could maintain and adapt both after my internship.
HOW
- •Collaborated closely with optical engineers, shadowing alignment sessions to pinpoint inefficiencies and opportunities for automation. Conducted interviews to understand key metrics and challenges faced during alignment and testing processes. Designed and constructed a custom test rig equipped with a 4-wavelength laser, micrometer stage, and laser profiler to facilitate precise testing. Leveraged Python for automation, utilizing libraries such as Python.NET for motor control and wxPython for GUI development. Solicited continuous feedback from engineers, iterating on the system design to meet their needs. Automated data capture from the laser profiler, implemented beam property analysis, and used curve-fitting algorithms to determine the laser's focal point with optimal precision. Presented findings and actionable recommendations to management, leading to the adoption of the system in ongoing microscope development projects.
Visual Documentation
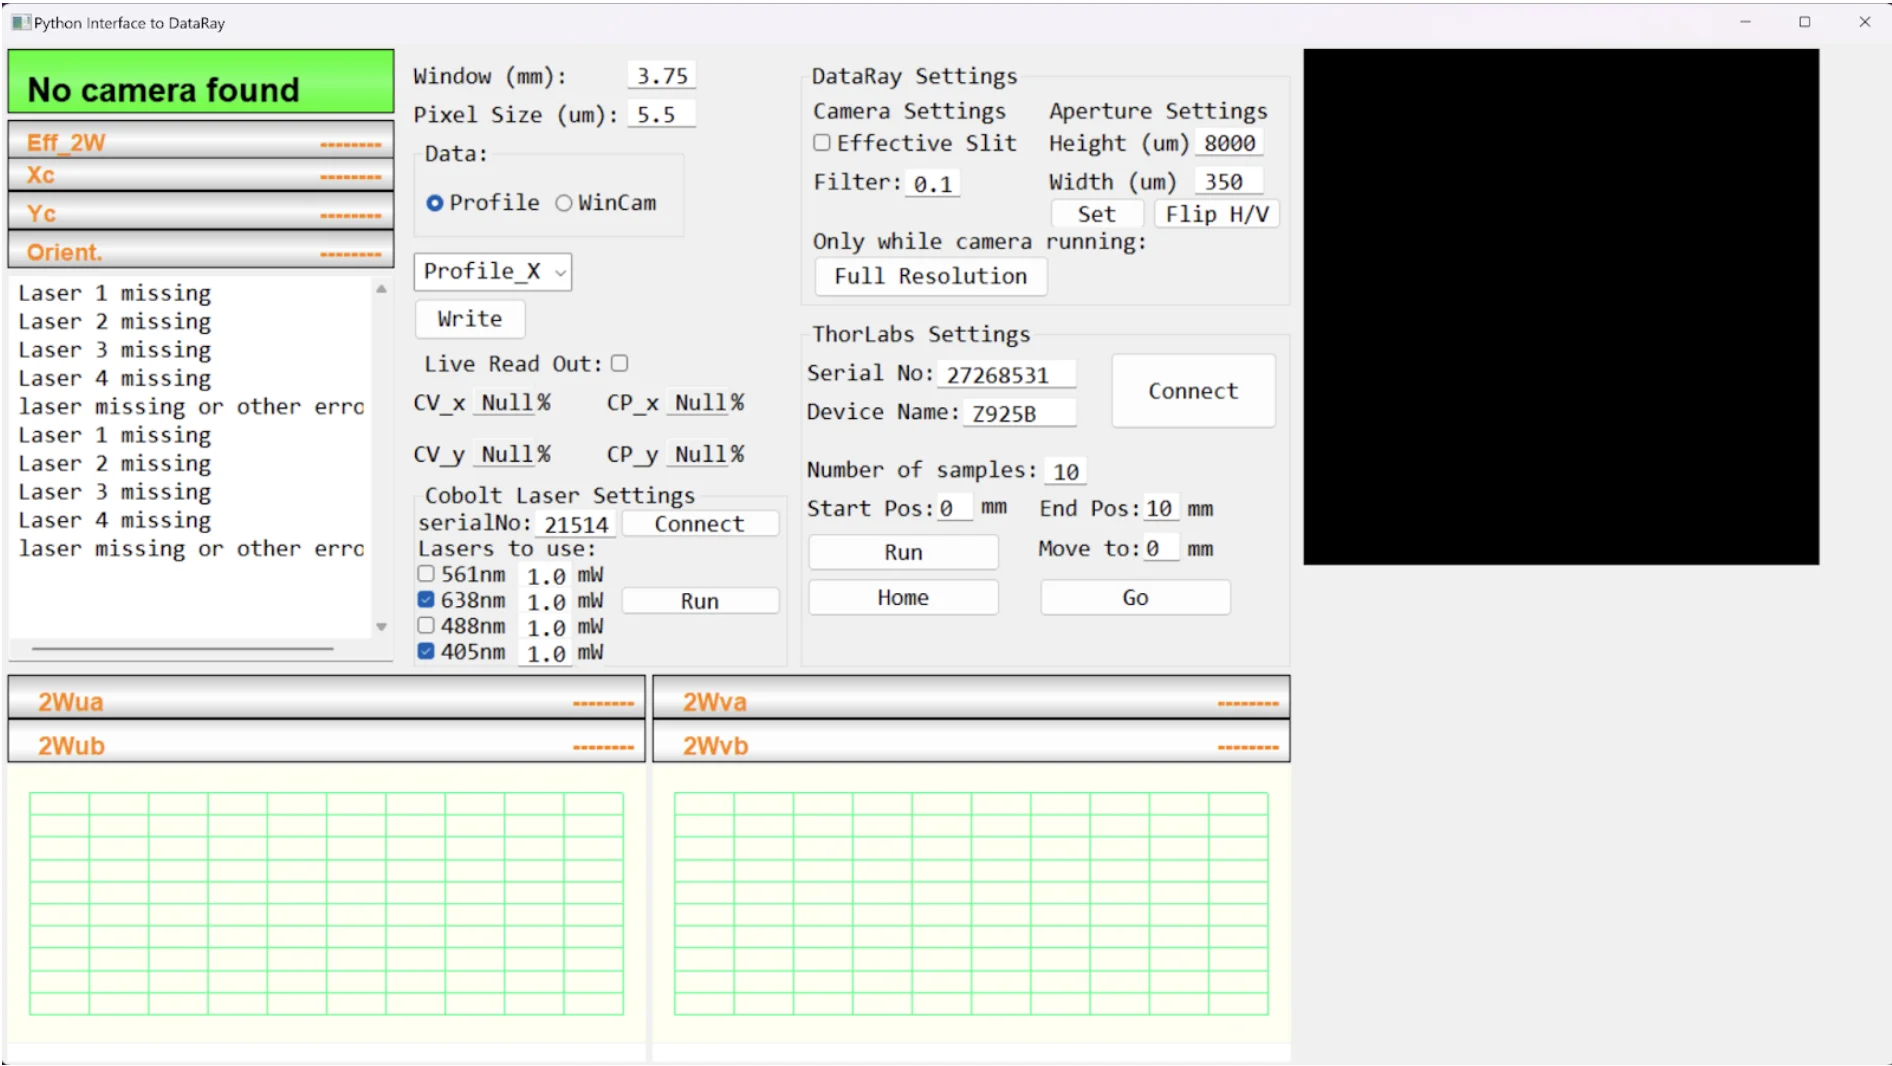
Real-time Python GUI
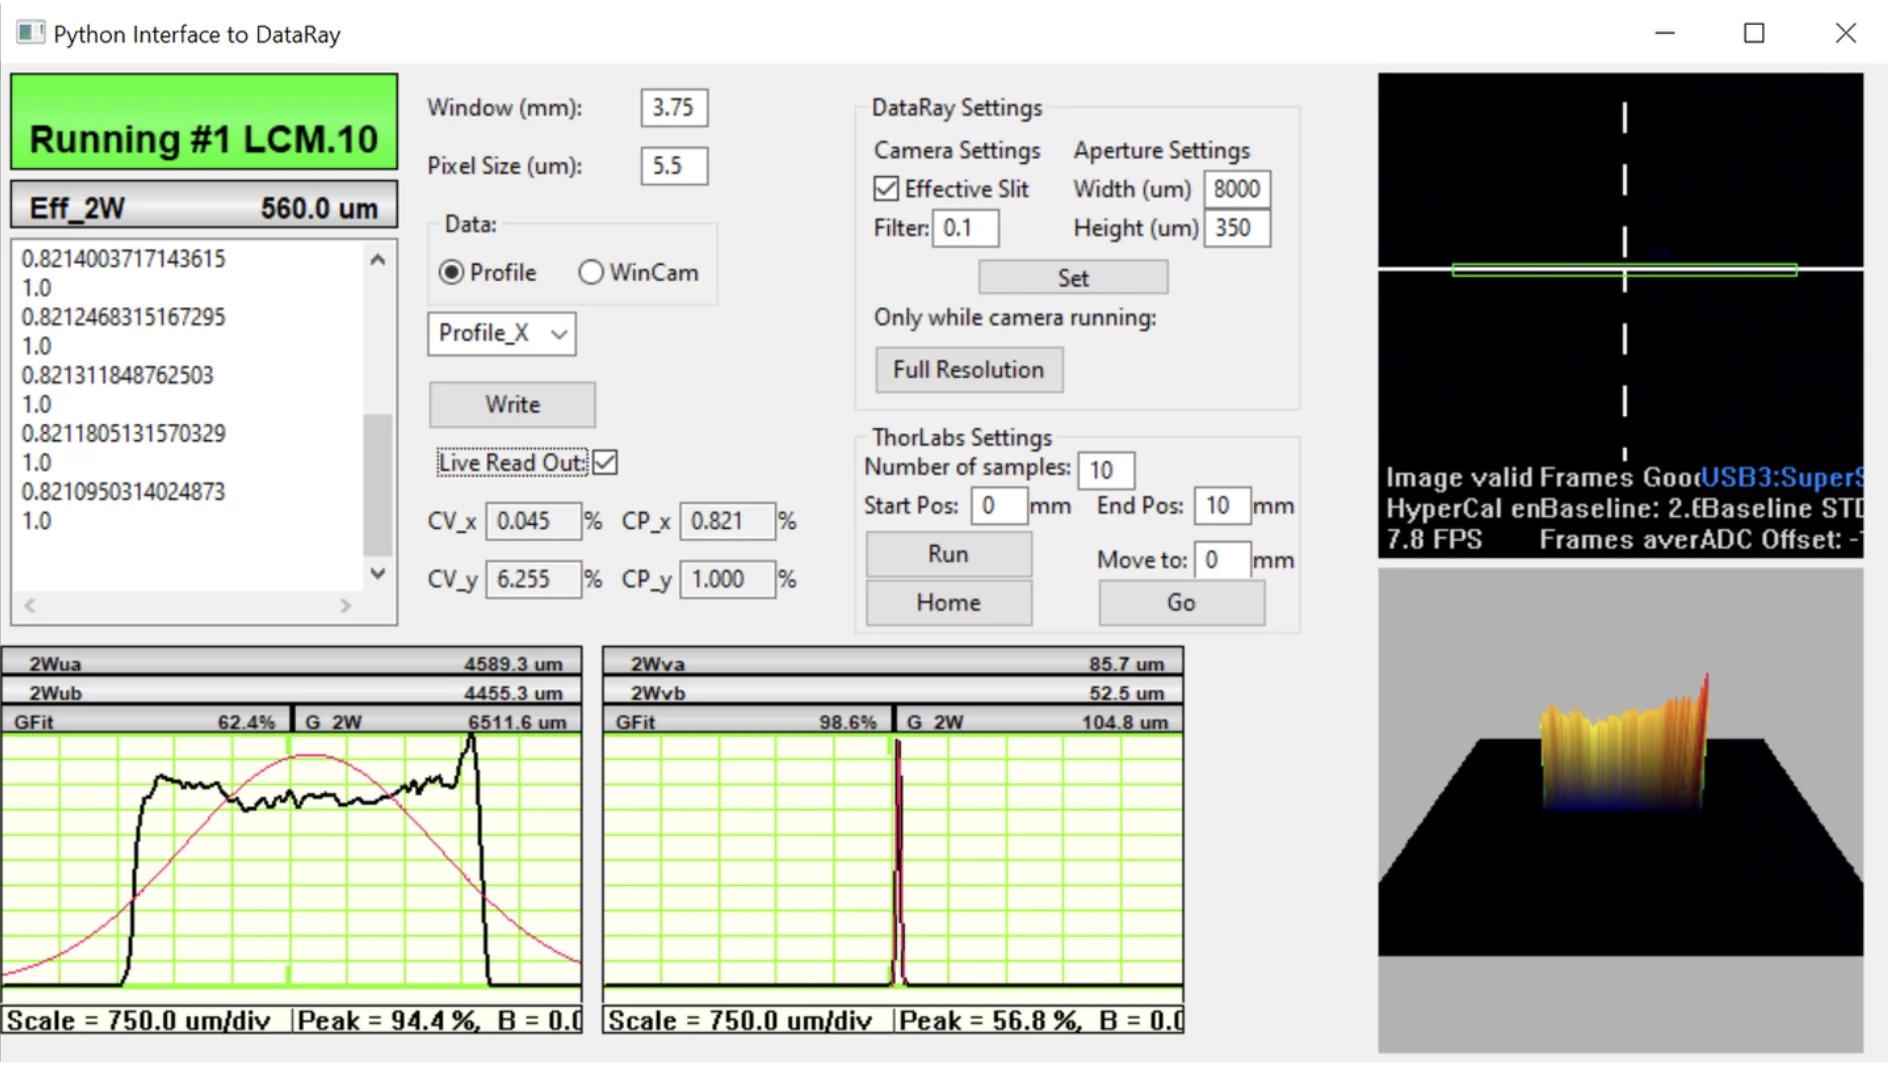
Previous iteration showing live usage with laser
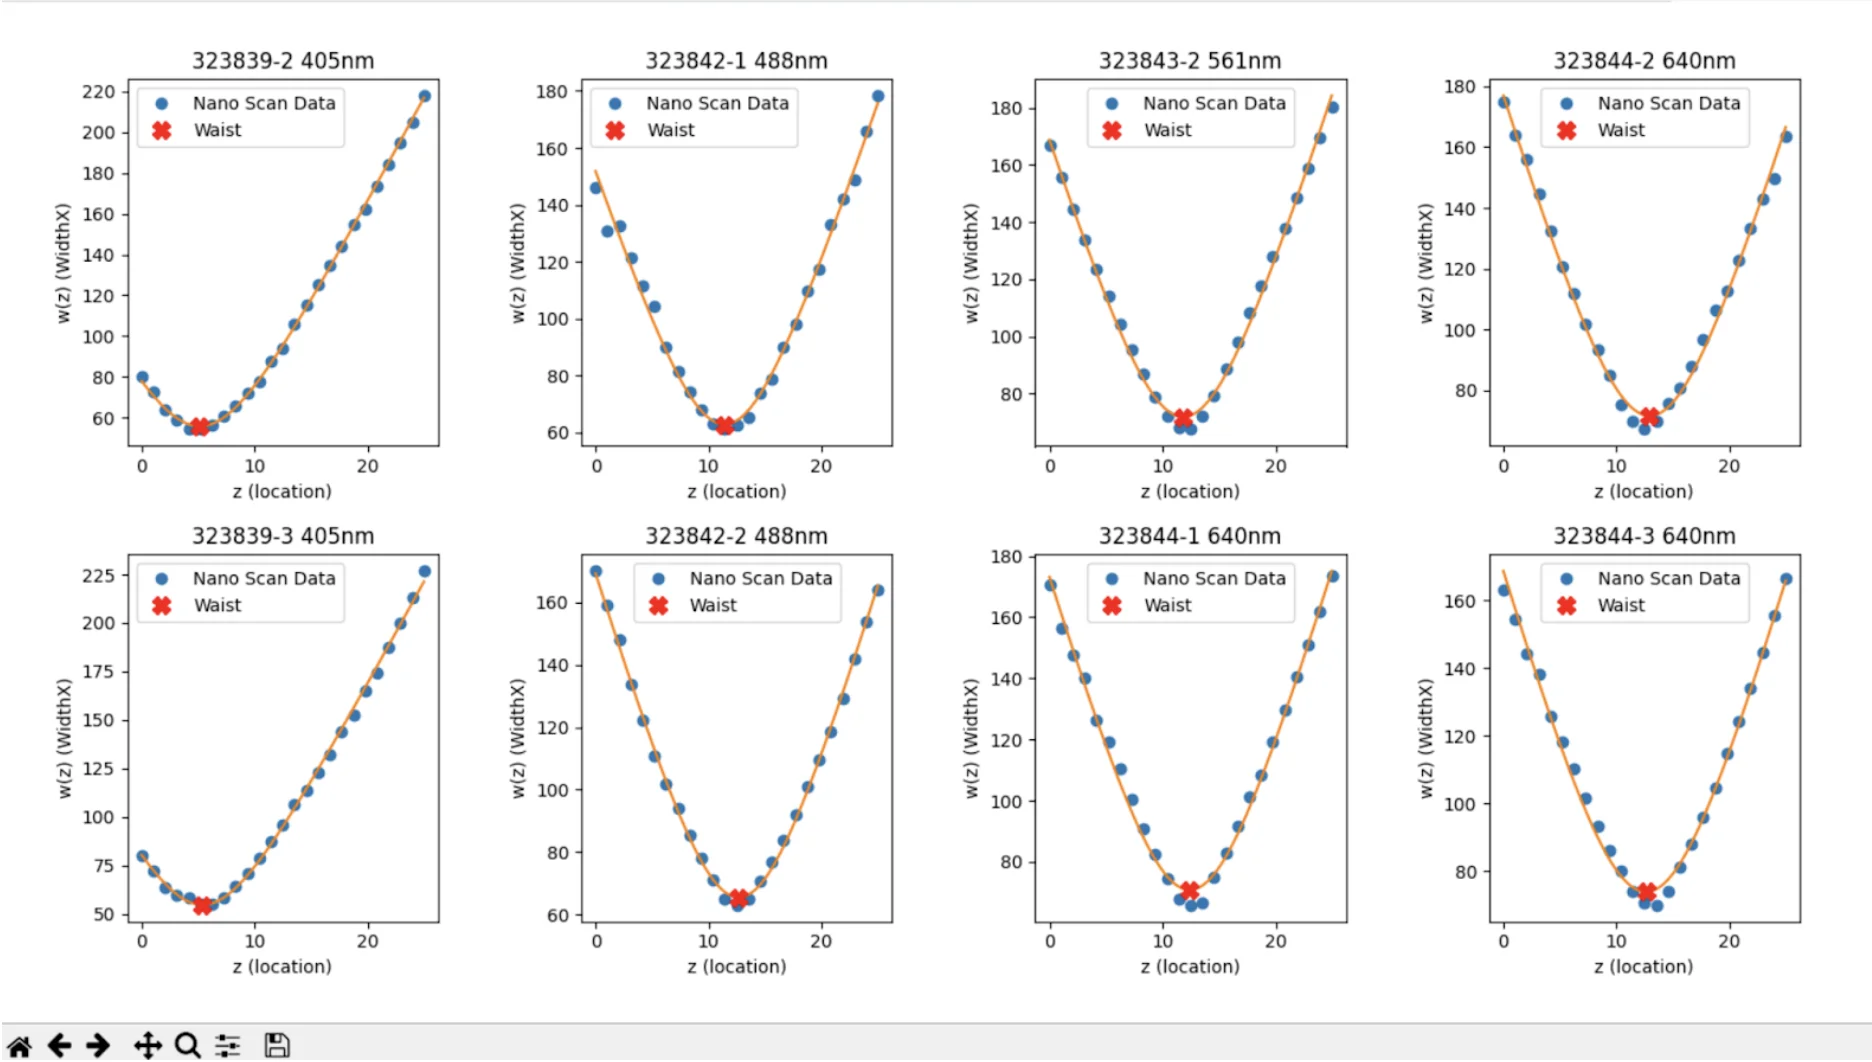
Generated data analysis to find focal point
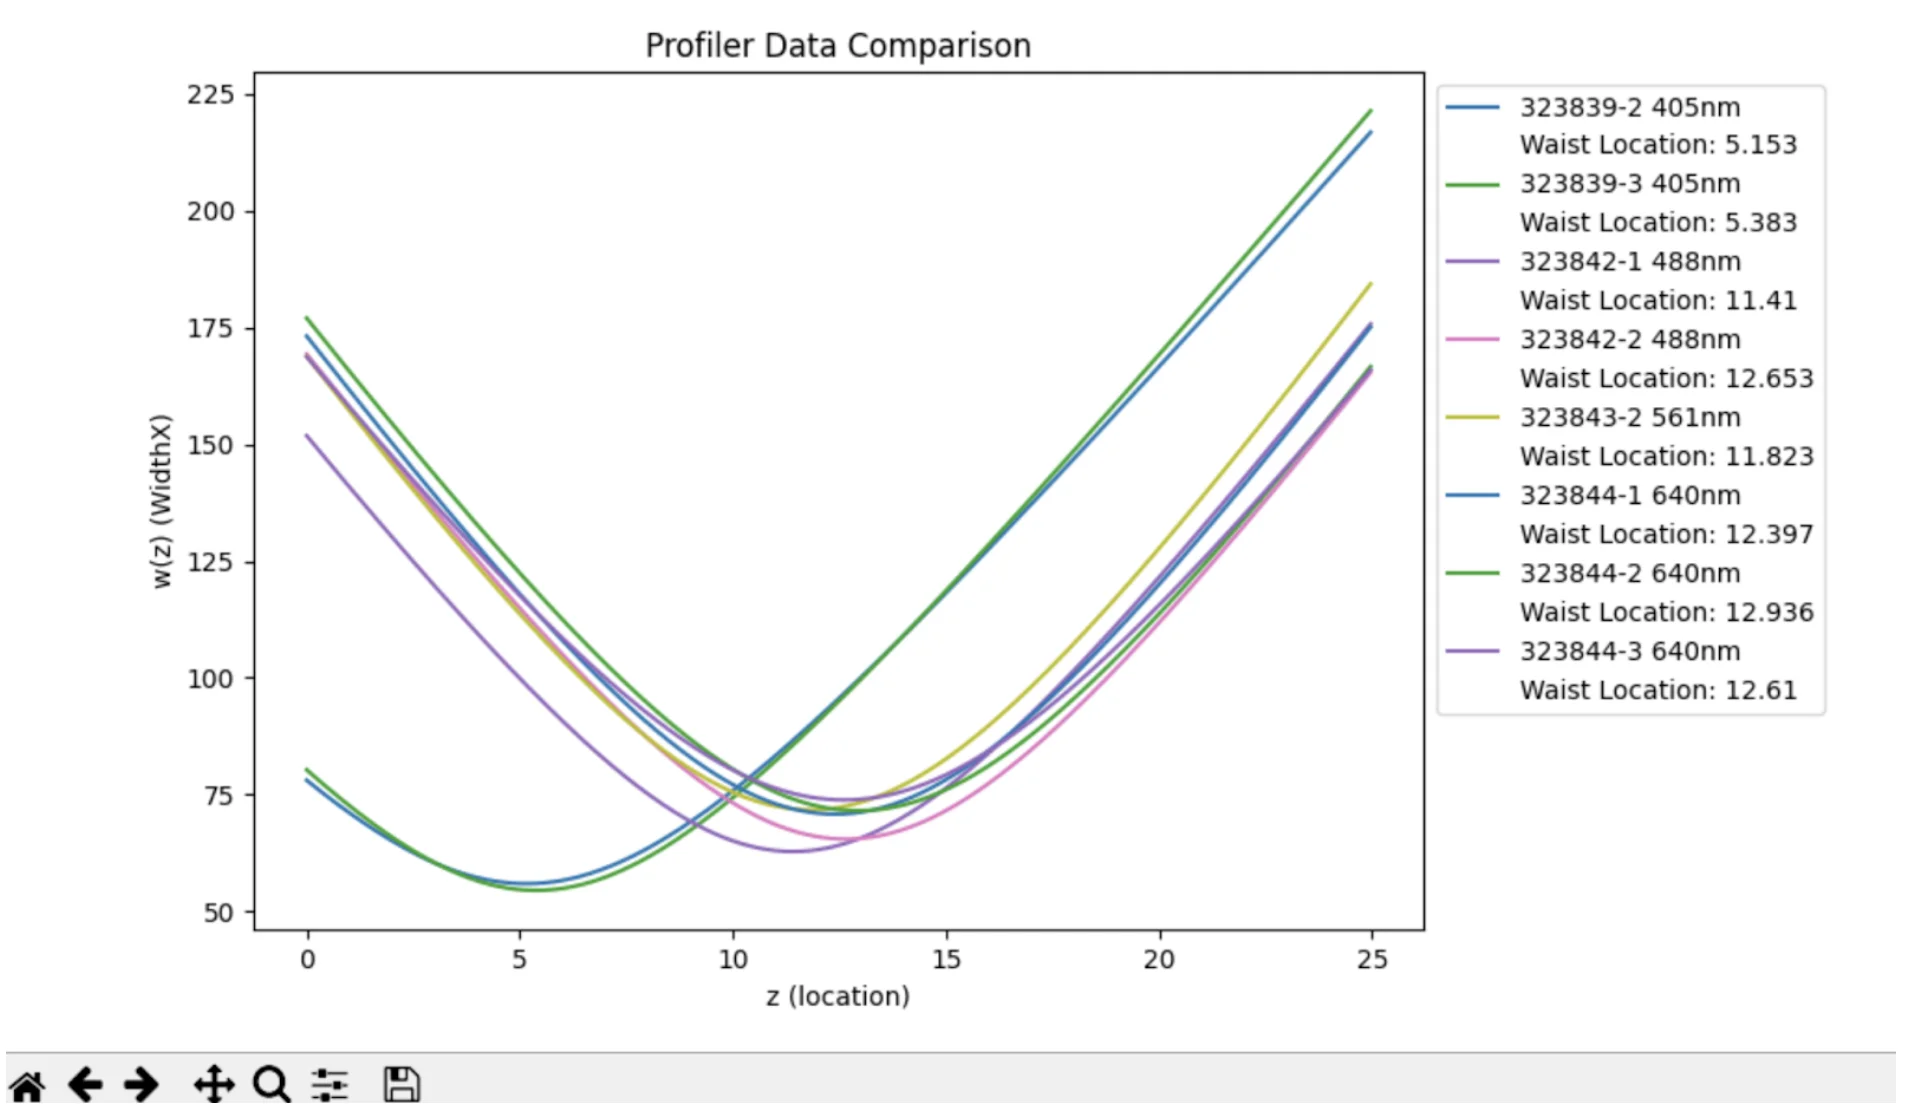
Lens and optic fiber reliability analysis
The Deep Dive
A detailed look into the personal learnings, implementation challenges, and outcomes from this project.
~ 3-5 minute read
Takeaways and Reflection
While I had projects in my coding classes in college, they have always been self contained within the computer. This was my first time using code to interface with the real world and hardware and then also take data from that hardware and analyze it. I learned a lot from this process about how to design experiments and analyze collected data to improve the experiment and come to recommendations for the company to implement. It was also my first time writing code that was not for myself, so I needed to not only ensure it was legible and easy to follow, but also write up documentation about it so that if others have any difficulties, they can refer to my documents.
Approach & Implementation
I set out to create a precise laser-focusing setup for our microscope by guiding beams through mirrors and a Powell lens, aiming for a single focal plane. Throughout this process, I received continuous feedback from the engineers who would use the final product, integrating their suggestions to optimize usability. I automated beam tracking using an image sensor on a transform stage, wrote a Python GUI to analyze the beam in real time, and implemented additional features such as toggling the effective slit and adjusting camera aperture size to refine data quality. Although controlling both the BladeCam2 sensor and the Thorlabs motors together was initially challenging on my laptop, I found a workaround by using the native Kinesis app before switching to Python automation, and everything ran smoothly on the lab desktop without extra steps.
Findings & Conclusion
Once the setup was complete, I presented the system to the team, and they noted how it dramatically simplified their workflow—they mentioned they literally didn't know how they would have done the job without my GUI. I further enhanced the program by adding functionality for NanoScan's photon NS2S-Si/9/5-PRO camera, allowing even more precise measurements of beam width and focus distance. For analysis, I built another wxPython GUI using Matplotlib to streamline data visualization and fit-curve comparisons. Finally, I thoroughly documented all code and procedures so the company can continue using and improving upon the setup after my internship ends.
Technologies & Skills